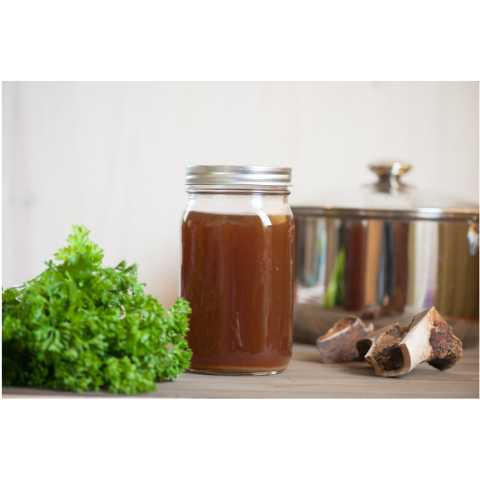
How to Make Bone Broth in Your Instant Pot
If you’ve been curious about making bone broth but short on time, good news: your electric pressure cooker is about to become your new best friend.
We all know bone broth is packed with nutrients that support healthy hair, skin, nails, and joints. That’s thanks to the natural collagen and gelatin found in bones. And when you start with bones from well-raised animals, like the ones right here at Creamery Creek, you get even more flavor and benefit in every sip.
Start with the Right Bones
I usually begin with our package labeled "Soup Bones" Our dry-aged beef bones with little meaty bits still attached. But honestly, any beef bones with marrow will work, especially bones from a roast or shank. The key is to use bones that have some connective tissue and marrow, that’s where the magic happens.
You can even reuse your bones for a second "lite" batch!
Step 1: Pressure Cook to Separate Meat & Bone
This is my fast-track method to separate out the meat:
-
Place the soup bones on the trivet in your Instant Pot.
-
Add about 4 cups of water.
-
Set to Manual / High Pressure for 60 minutes.
After cooking, remove the bones and separate the meat. Leave the marrow (that creamy, white center inside the bone) right where it is. I save the meat for things like casseroles, sauces, or scrambled with eggs for a quick, protein-rich breakfast.
Optional flavor boost: Roast or smoke your bones before this step. It deepens the flavor of your finished bone broth.
Step 2: Make Your Bone Broth
Now it’s time to make the actual broth:
-
Place the bones back into the Instant Pot liner, and fill halfway with water.
-
Add:
-
1 tablespoon apple cider vinegar (helps draw nutrients from the bone)
-
A handful of onion scraps and celery pieces
-
-
Make sure not to exceed the “Max Fill” line.
-
Close the lid and set the valve to Sealing.
-
Press Manual, then use the “–” button to go all the way down to 0... then press it one more time. Magic! You’ll get 240 minutes (4 hours) of pressure cooking time.
Want extra-rich, jiggly broth? I often run it for two 240-minute cycles, especially if I’m planning to freeze some for future use.
Step 3: Strain & Store
Once it's done, pour everything through a strainer into a large bowl. Then choose your own adventure:
-
Feeling organized? Pour into quart-sized freezer bags and freeze for future soups, stews, or sipping.
-
Feeling realistic? Pop it into a pitcher in your fridge and ladle out what you need throughout the week.
Why Bone Broth from Our Farm Makes a Difference
Our beef soup bones come from animals raised with care, on grass, sunshine, and respect. That matters, not just for ethical reasons, but because high-quality bones make better-tasting broth with more nutrients.
So pull out that pressure cooker, grab a pack of Creamery Creek bones, and give this a try. Let me know how it goes for you, I’d love to hear how you’re using your broth!
XOXO,
Louisa


Leave a comment
Also in Farm Family Recipes
The Church Method for Perfect Beef Roasts
There is a whole world of cooking that never made it into cookbooks. It lives in church basements and community halls where somebody’s aunt has been feeding a crowd for decades and never once owned a digital thermometer. The “church basement method” is simple. Multiply the weight of your roast by time, set the oven to a steady low heat, and follow one important rule. Don’t peek.
It works with everyday beef roasts like sirloin tip, chuck, rump, and top round, which means you do not need a prime rib to put something special on the table.
Keep reading
Slow Cooker Meals for Busy Farm Nights
When chores run late and the weather turns cool, nothing beats a slow cooker meal waiting at the end of the day. Here are our favorite Creamery Creek cuts and easy ideas for fall and winter suppers that cook themselves while you work.
Keep reading
Sweet & Tangy Holiday Meatballs (Farmhouse Appetizer Recipe)
There’s always that one dish that disappears first at every holiday party and these little meatballs are it. Made with our own Creamery Creek Meatball Mix (a blend of dry-aged beef, Duroc pork, and just the right touch of onion), this recipe brings that cozy, sweet-and-smoky flavor everyone loves. A quick toss in sweet fruit jam and BBQ sauce blend, a brush under the broiler, and you’ve got the perfect farmhouse appetizer for the season.
Keep reading